Average Reviews:

(More customer reviews)My wife and I wanted to keep an eye on the nanny with our baby from work. After researching the network cameras for several months, it seemed that only Panasonic cameras consistently received positive (usually glowing reviews) whereas cameras from other major brands like Linksys, D-Link, etc received mediocre or poor reviews. So I went with Panasonic. And after about a month, I have to say I am very impressed with it. Some background: I have a classic Linksys WRT54G 802.11g router, with 2 WinXP PCs connected to it via ethernet and 3 more PCs connected wirelessly; plus, I have AT&T/SBC DSL service via a Speedstream 5100 DSL modem. If you're moderately computer literate, you should have no problem following the included instructions to setup (view and control) the camera in wired mode or in wireless WiFi mode.
But if you want to setup the camera to be viewed (and controlled) from the internet, you need to do a bit more work. And this is where Panasonic's excellent, excellent customer support comes in. Panasonic's support line is 8_0_0-2_7_2-7_0_3_3; they are open Mon-Fri 9AM-9PM and Sat/Sun 10AM-7PM Eastern US Time; this tech support is available to you for the LIFE of the product. They will walk you through how to setup the camera, configure your router (for, among other things, port forwarding), and register with Panasonic's FREE Dynamic DNS web service. This last point is important: Panasonic network cameras include FREE Dynamic DNS hosting service for the life of the product; other brands offer the service for an annual fee.
Okay, step-by-step, here's how to config the camera for internet viewing:
First, if you use DSL as I do (as opposed to cable broadband), you have to configure the DSL modem for "bridge mode." (If you don't use DSL, then you can skip this step.) This is because DSL modems act as a router, and port forwarding cannot work behind both the DSL modem's router and (in my case) the Linksys WRT54G router. If you want, you can call your DSL tech support to ask them to walk you through how to "bridge" your DSL modem. But here's what I did.
1. Login to your DSL modem (for me, it's 192.168.0.1) using your DSL account (for me, it's my SBCglobal email address).
2. Select Advanced >> PPP Location
3. Select Bridged Mode (PPPoE is not used), then Change PPP Location
4. When prompted, restart the DSL modem
5. Login to your router (for me, it's 192.168.1.1)
6. Under Setup> Basic Setup >> Internet Connection Type, select PPPoE and enter the DSL login & password info you normally would enter in your DSL modem to authenticate your DSL service.
7. At this point, the "bridging" should have been successful. To check that bridging has been successful, click Status >> Router, and check that you are "connected" with an IP address showing. If successful, you should also see that your DSL modem's "internet" LED light is off while your router's "internet" light is on. What you basically have done is to move the point of authentication for your DSL service from the DSL modem to your router; your DSL modem merely acts as a bridge for the DSL service to your router.
8. Now, we move on to configuring the camera itself. I assume that the camera has already been configured for wired and wireless mode. Login to the network camera (for me it's, 192.168.1.253).
9. Click Setup. Change the Port No. from the default of 80 to 50000 (fifty thousand) and enter the IP address of the camera (for me, it's 192.168.1.253). Click Save, and the camera will restart. When it finishes restarting (taking as long as 1.5 min), it'll bring you back to the "Top" home page of the camera config screen.
10. Log back into your router, and go to Applications & Gaming, where you'll be able to set up port forwarding.
11. In the Port Range, enter 50000 as "Start" and 50000 as "End." Enter the IP Address of the camera (for me, 192.168.1.253). Check Enable. Save Settings.
12. Now, log back into your camera. Go to Setup >> DynamicDNS. Select viewnetcam-dot-com, then Next.
13. Click on "Your Account Link" to bring up the viewnetcam.com registration page, where you then select New Registration. Enter your desired registration info and select your domain name at viewnetcam-dot-com (e.g. yourname-dot-viewnetcam-dot-com). Click Choose.
14. Now, you will be shown a page confirming your registration. Under DDNS status, you will see Active-waiting. You need to wait up to 10min as the domain registration occurs, at which time, the status will change to Active.
15. We're almost done; stay with me! From WinXP Start Menu, click Run and type "cmd" to bring up a DOS window.
16. In the DOS window, type "ipconfig/all", which shows your computer's various network information. Under Ethernet adapter Local Area Connection, copy down the two addresses under DNS Servers.
17. Log back into your camera, select Setup, and enter the 2 DNS Server addresses from ipconfig/all in the 2 DNS boxes.
18. Go back to viewnetcam-dot-com, login to your account, and check that the DDNS status is now Active. If so, then you're all ready to go!
19. Go to yourname-dot-viewnetcam-dot-com:50000 to see your network camera on the internet!
Click Here to see more reviews about:
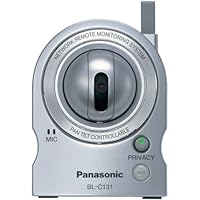
Panasonic BL-C131A Network Camera Wireless 802.11Wireless Network Camera 802.11g, MPEG4, Automatic Network Configuration, Universal Plug and Play, Set-up Wizard, Remote Pan/Tilt Control, Built in PIR motion detector

Click here for more information about Panasonic BL-C131A Network Camera Wireless 802.11